How to Paint a Self-Portrait: A Step-by-Step Guide for Beginners
Creating a self-portrait is a unique way for artists to explore their identity and express their individuality through art. To successfully paint a self-portrait, one should start by observing their features and emotions with honesty, using a mirror or a photograph as a reference. This process allows artists to capture not just their physical appearance but also their inner thoughts and feelings.
Choosing the right materials is essential for any painting endeavor. Artists can opt for oils, acrylics, or watercolors, each offering different textures and effects. By experimenting with various techniques and styles, they can find the approach that best reflects their vision. Self-portraiture is not merely about replication; it’s an opportunity for self-discovery and reflection.
In addition to technique, the background and composition play a crucial role in the overall impact of the portrait. Simple backgrounds can help focus attention on the subject, while more complex settings can tell a story about the artist. Ultimately, painting a self-portrait is about conveying the essence of the individual in a way that resonates with viewers.
Planning Your Self-Portrait
Planning is crucial for a successful self-portrait. Considering materials and workspace setup can significantly influence the painting process and outcome.
Choosing the Right Materials
Selecting appropriate materials is vital to achieving the desired effect in a self-portrait. An unstretched canvas is often ideal for experimentation, while a stretched canvas allows for a polished finish.
- Paint Type: Acrylics dry quickly and are great for layering, while oils provide depth and richness but require longer drying times.
- Brushes: A variety of brush sizes accommodates different techniques, from fine details to broader strokes.
- Palette: A wooden or glass palette can help mix colors effectively and maintain control over tone and shade.
Additionally, a mirror is essential for observing proportions and fine details while painting.
Setting Up Your Workspace
An organized workspace enhances focus and flexibility during the painting process. Start by positioning your easel at a comfortable angle, ensuring there’s enough room to move around it.
- Lighting: Natural light is ideal, but adjustable artificial lights can also work. It should illuminate the canvas uniformly.
- Table/Surface: A sturdy table for paints, brushes, and other materials will keep everything accessible.
- Mirror Placement: The mirror should be positioned to reflect your face clearly while you paint.
Maintaining a clean and orderly environment promotes creativity and reduces distractions.
Composing the Portrait
Successful composition in a self-portrait involves mastering proportions and accurately capturing one’s identity. By focusing on these essentials, the artist can create a powerful representation.
Understanding Proportions
Proportions are crucial for achieving an accurate likeness. To begin, artists should create a basic outline of the face, dividing it into sections.
- Facial Structure: Measure the distance between the eyes, nose, and mouth. A common guideline is that the width of the face can be divided into five equal parts, with the eyes positioned in the middle.
- Eye Level: Generally, the eyes sit about halfway down the head. This helps establish the baseline for other features.
- Symmetry: Aim for balance, but remember that true human faces are rarely perfectly symmetrical. Minor variations can add character.
Understanding these concepts will guide the artist in forming a realistic and cohesive portrait.
Capturing Your Identity
A self-portrait should resonate with the artist’s unique identity. It’s essential to reflect personal traits and emotional expressions.
- Expression: Focus on conveying mood through facial expressions. A slight smile or a furrowed brow can tell a story.
- Details: Incorporate specific features that define the individual, such as freckles, scars, or unique hairstyles. These make the portrait personal.
- Color Choices: Select a color palette that resonates with personal feelings. Warm tones can evoke comfort, while cooler shades might express calmness.
By weaving identity into the composition, artists can create a portrait that is not just a likeness but also a representation of the self.
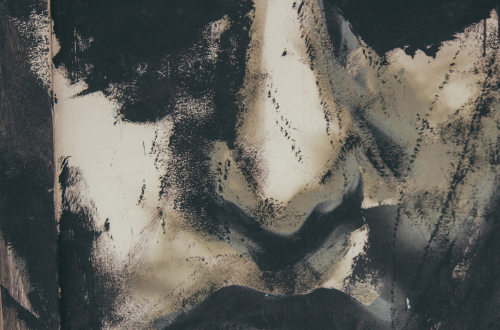
Painting Techniques and Application
Effective techniques are essential for creating a successful self-portrait. Key factors include layering for depth, achieving accurate skin tones, and adding fine details for realism.
Layering and Texture
Layering is a crucial technique in portrait painting. It allows for a rich texture and depth that enhances the likeness. Starting with an underpainting in a neutral tone helps establish values. This foundation can be built upon with multiple layers of color.
Using a variety of brushes adds texture. For a smoother finish, use soft brushes for blending. To create rough textures, consider stiffer bristles. Building layers gradually can help prevent the paint from becoming too thick.
After applying initial layers, allow sections to dry before adding more detail. Glazing with thin, translucent layers can create a luminous effect. This method works well for skin tones, enhancing the depth and warmth.
Achieving Accurate Skin Tones
Capturing realistic skin tones requires a careful mixing of colors. Start by knowing the base tone of the skin. Using a palette with the primary colors—red, yellow, and blue—can help create a suitable range.
Mix a base color, then add small amounts of complementary colors to adjust the tone. For warmth, adding a hint of yellow or red can enhance the complexion. Cool tones can be achieved by integrating a touch of blue or green.
Test mixed colors on a scrap piece of canvas before applying them to the portrait. This ensures the tone matches the intended result. Layers of skin tones can be painted over one another to create shadow and highlight effects.
Adding Details and Final Touches
Details are what make a self-portrait unique. After establishing the primary features, focus on enhancing the eyes, lips, and hair. Using a fine brush allows for precise strokes.
Eyes can be defined with darker shades to create contrast. Add highlights to the pupils to bring them to life. Lips should include a mix of dark and light shades for dimension.
Final touches can include adjusting highlights and shadows on the face. A soft brush can help blend these areas seamlessly. Remember to step back frequently to assess the work from a distance. This perspective can guide further refinements.
Learning from Masters
Studying the techniques and styles of renowned artists can significantly enhance one’s ability to create impactful self-portraits. By examining the works and methods of masters such as Rembrandt, Van Gogh, Kahlo, and Freud, artists can gain insights that elevate their practice.
Studying Works of Rembrandt and Van Gogh
Rembrandt’s self-portraits are celebrated for their emotional depth and mastery of light. He used chiaroscuro, contrasting light and shadow, to create dimensionality in his subjects. Artists are encouraged to experiment with this technique to add realism to their work.
Van Gogh’s self-portraits feature bold colors and brushstrokes that convey intense emotion. His expressionistic style invites viewers into the artist’s psyche. Emulating Van Gogh’s use of color and dynamic lines can help convey personal narratives in self-portraits.
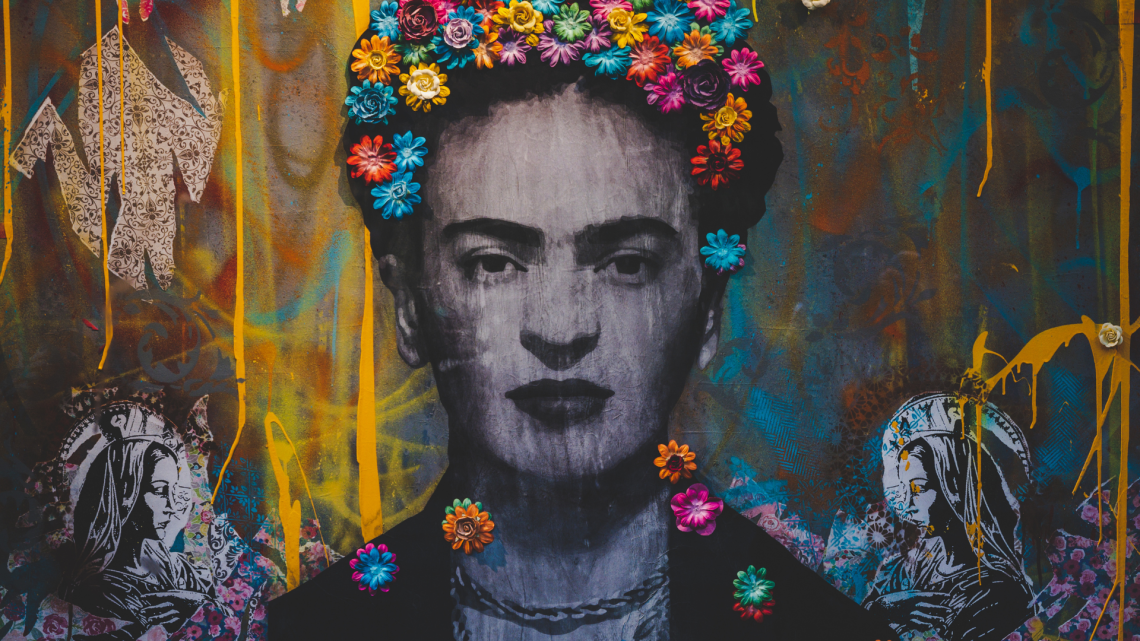
Incorporating Techniques of Kahlo and Freud
Frida Kahlo’s self-portraits often blend personal symbolism and vibrant color palettes. She emphasized raw emotional expression, using elements like flora and fauna to reflect her identity and experiences. Artists may adopt symbolic elements in their work to convey deeper meanings.
Lucian Freud is known for his realistic portrayal of subjects, often focusing on texture and the human form. His layering technique can add complexity to a self-portrait. By studying Freud’s approach, artists can learn to create rich, tactile surfaces that bring their subjects to life.


You May Also Like
The Relationship Between Fine Art and Photography: Exploring Their Interconnections and Influence
Exploring the Boundaries of Abstract Photography